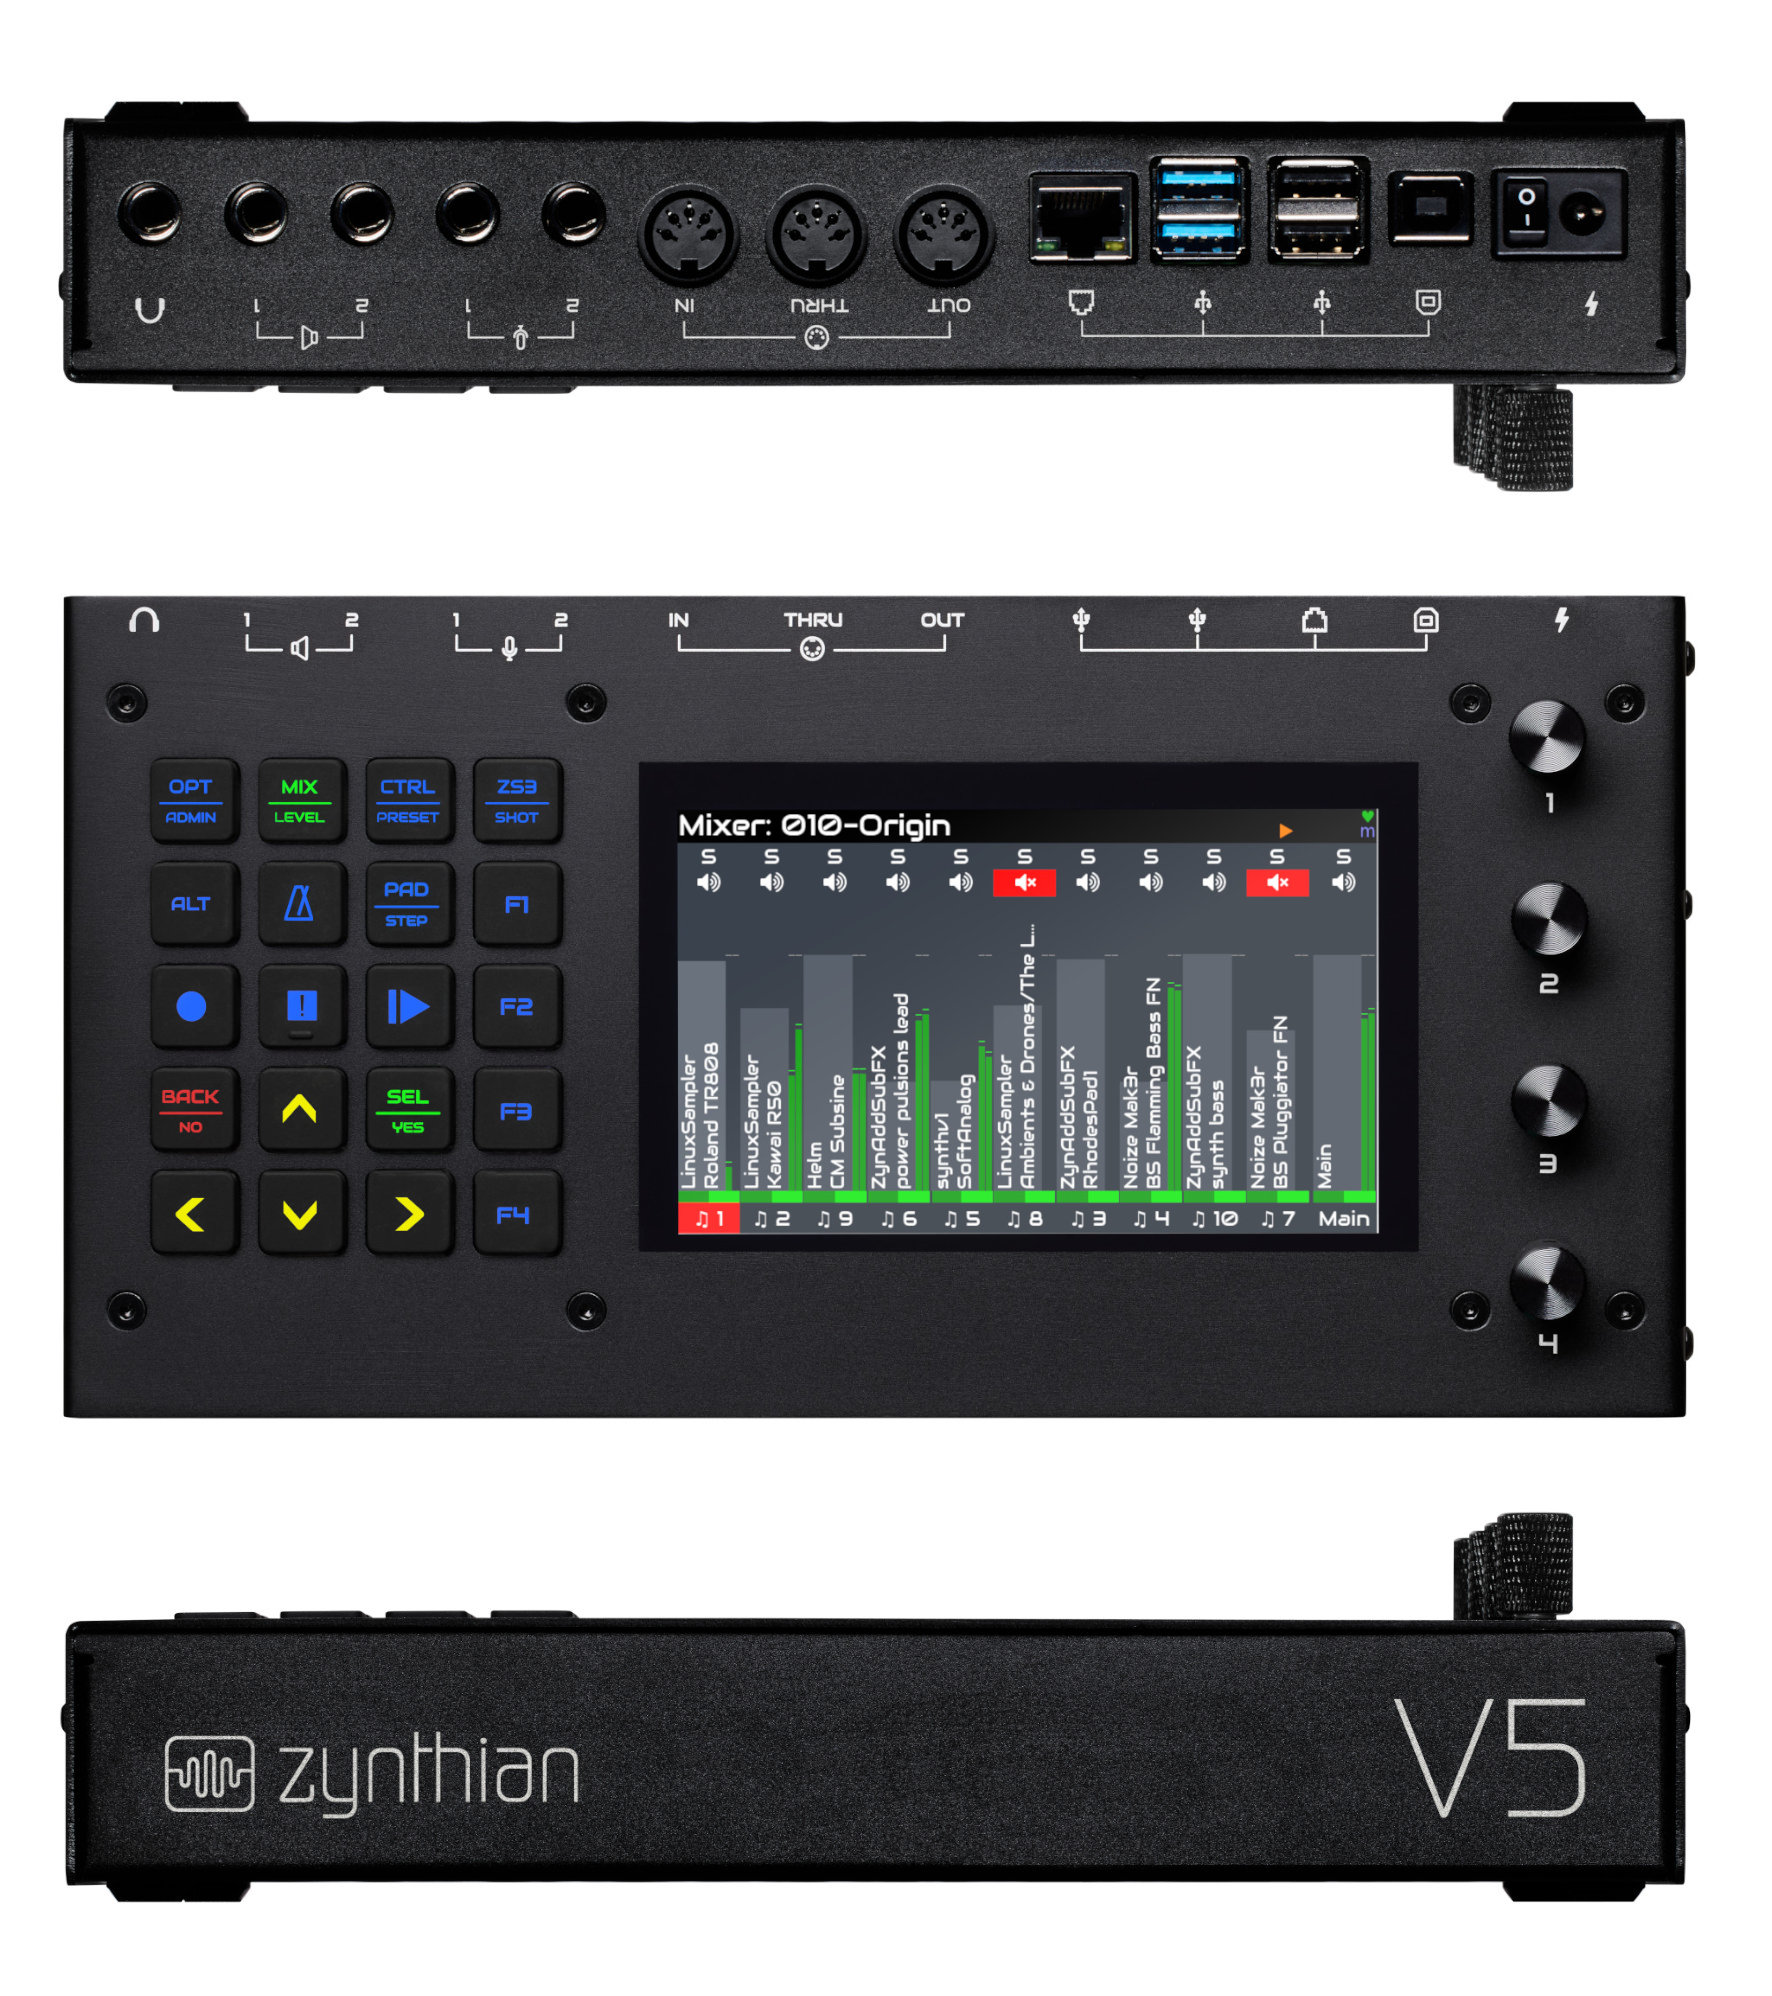
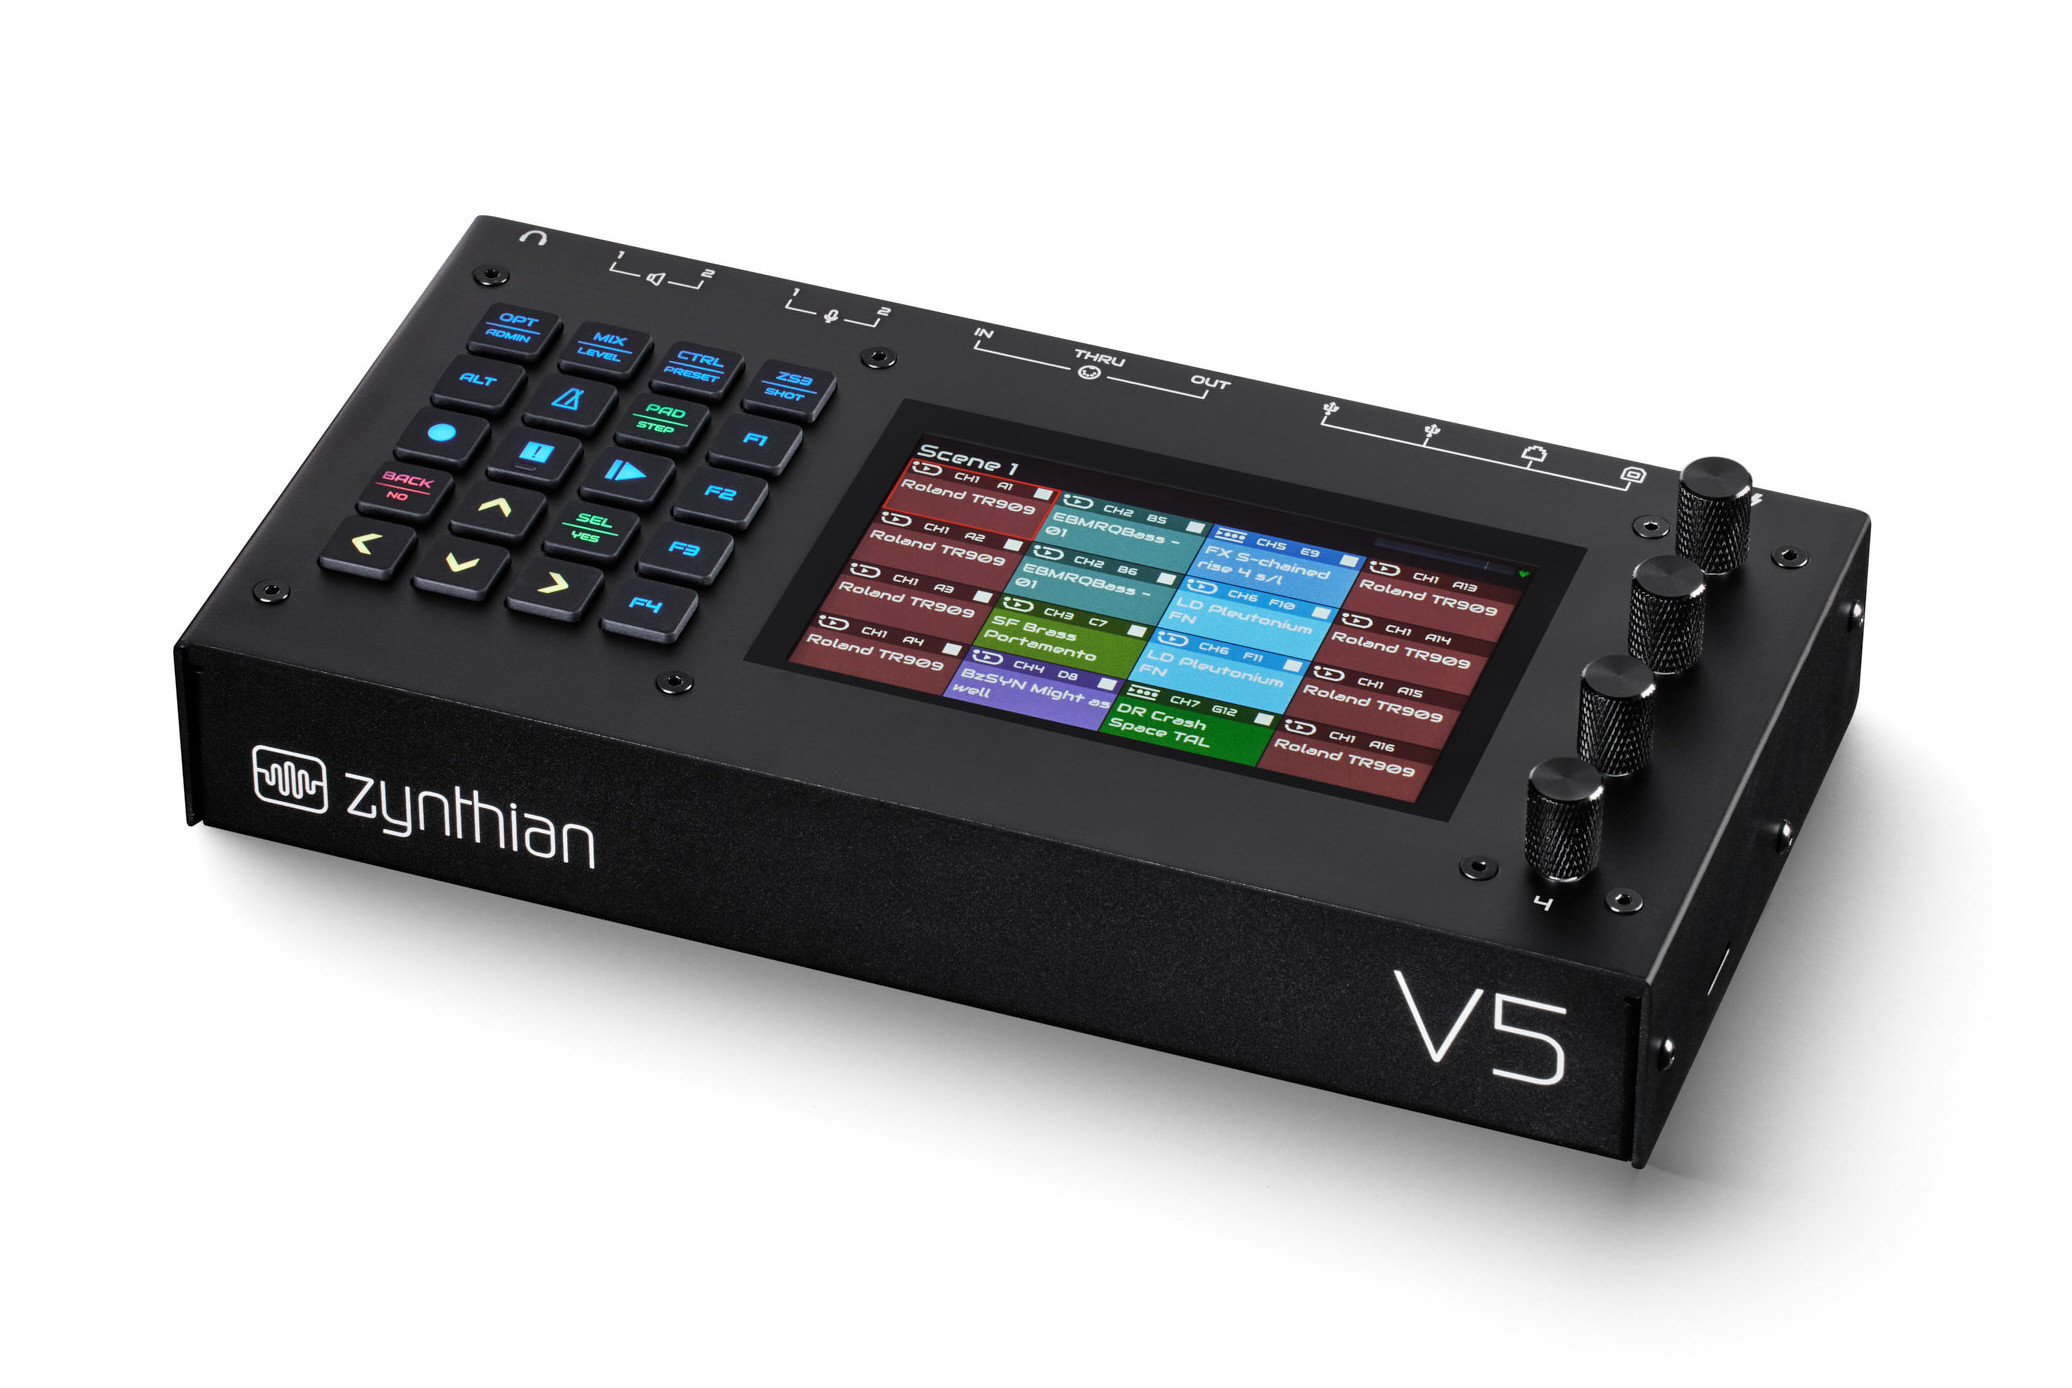
We are proud of announcing the arrival of the long-awaited Zynthian Kit V5, the latest creation from ZynthianLabs.
It’s been a long journey and certainly i could tell a good story about the development of V5, its roots, epiphanies, setbacks and sorrows, but i better leave this for a next entry and put the focus in the device itself, the V5.
We could say that the V5 is more of the same thing, but it doesn’t sound very appetizing, right? Although it’s not false at all: more design, more display, more buttons, more connectivity, more power, more usability, more quality, more integration. More can be really much more.
The Main Board
The core of the V5 is the main board, the jewel of the crown. It is, by itself, a remarkable framework for developing audio & midi applications based in Raspberry Pi, and because of this we are going to sell it separately for those wanting to create advanced audio & midi devices, zynthian or not, based on it.
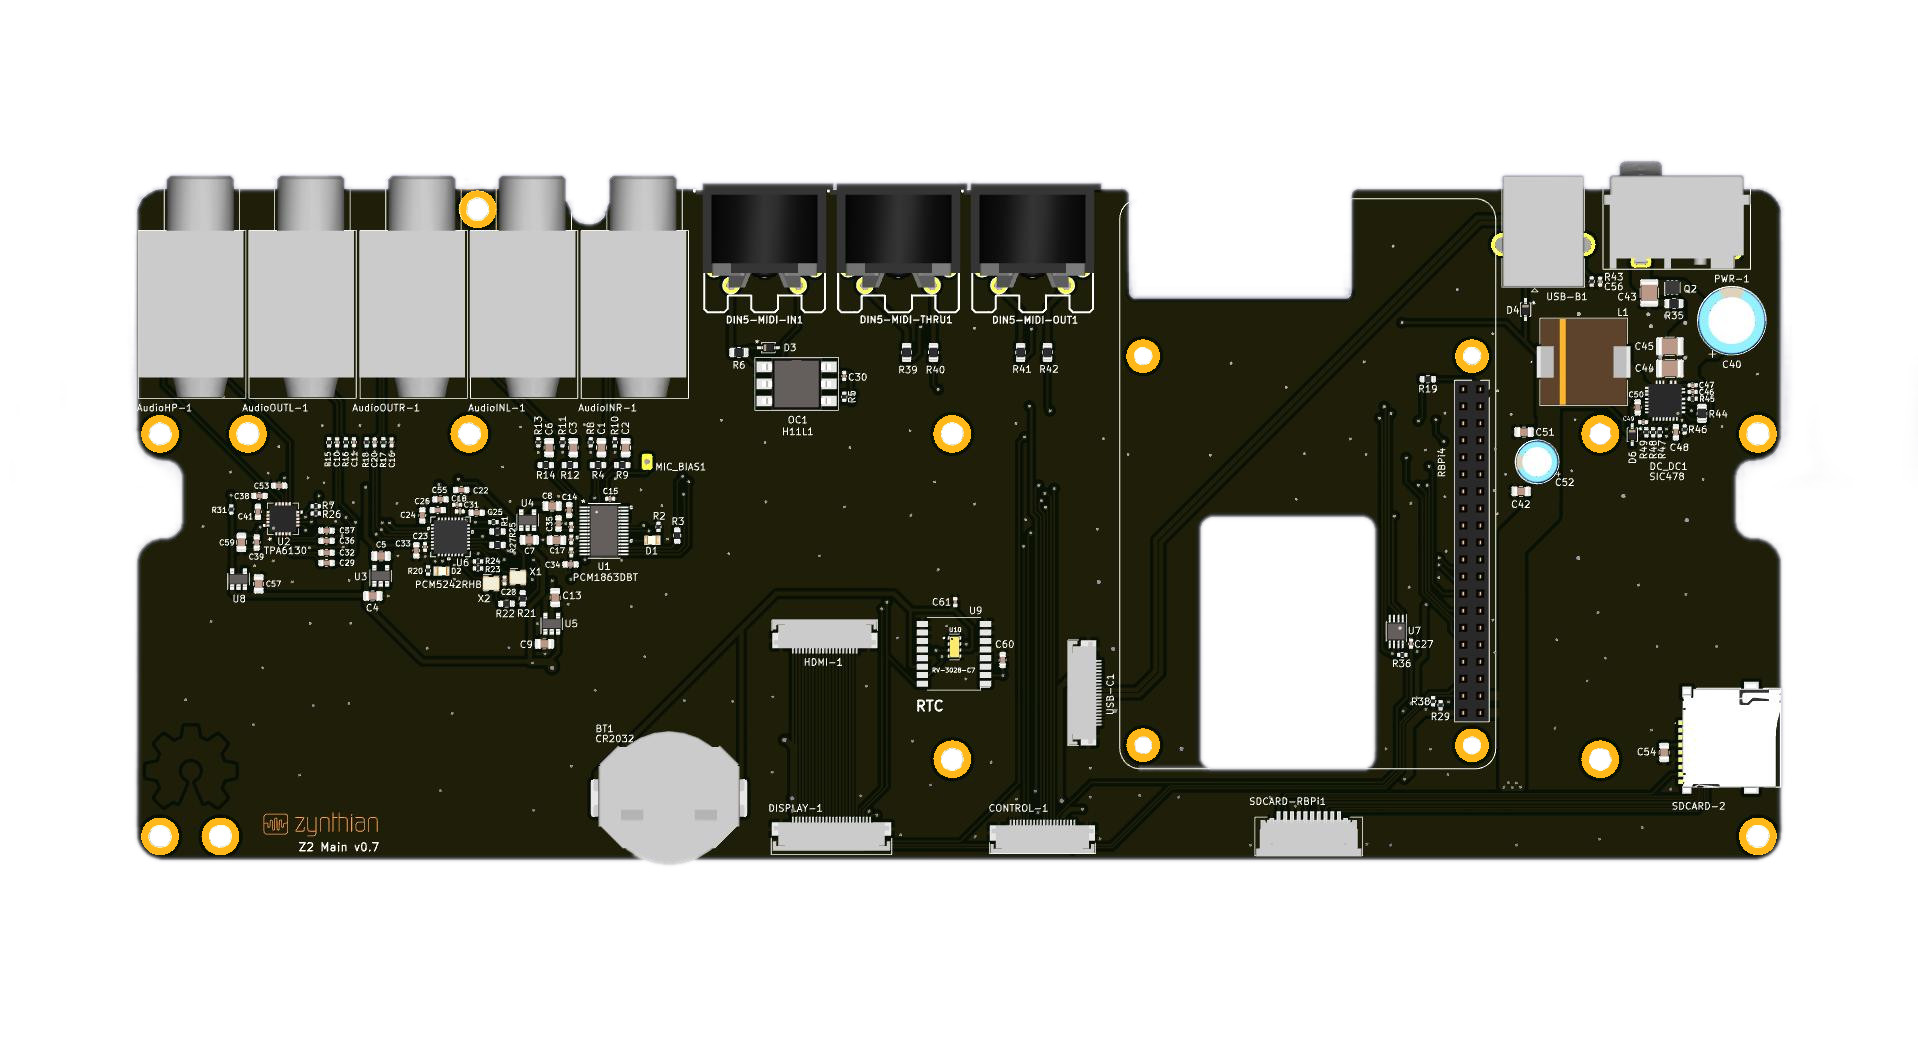
The V5 main board integrates a good amount of interesting stuff:
- SIC478 buck power converter => 2.5 mm barrel connector + switch
- Audio Output DAC PCM5242 (TI/BurrBrown) => 2 x balanced TRS
- Audio Input ADC PCM1863 (TI/BurrBrown) => 2 x balanced TRS
- Headphone Amplifier TPA6130 (TI) => 1 x stereo TRS
- Standard MIDI ports (IN/OUT/THRU) => 3 x DIN-5 connectors
- USB type B connector for USB-device operation.
- Ultra-low power & high accuracy RTC RV-3018-C7.
- CR2032 lithium battery holder.
- On-board control FDC 20 pin (GPIO, SPI, I2C).
- On-board display FDC 24 pin (HDMI, GPIO + I2C for touch).
- On-board uSDC holder/extender.
If you want the bizarre details, click in the part names to open the data-sheets and learn every detail. To not be boring here i simply would say that it brings more electric power and audio quality than most applications, including zynthian, would require.
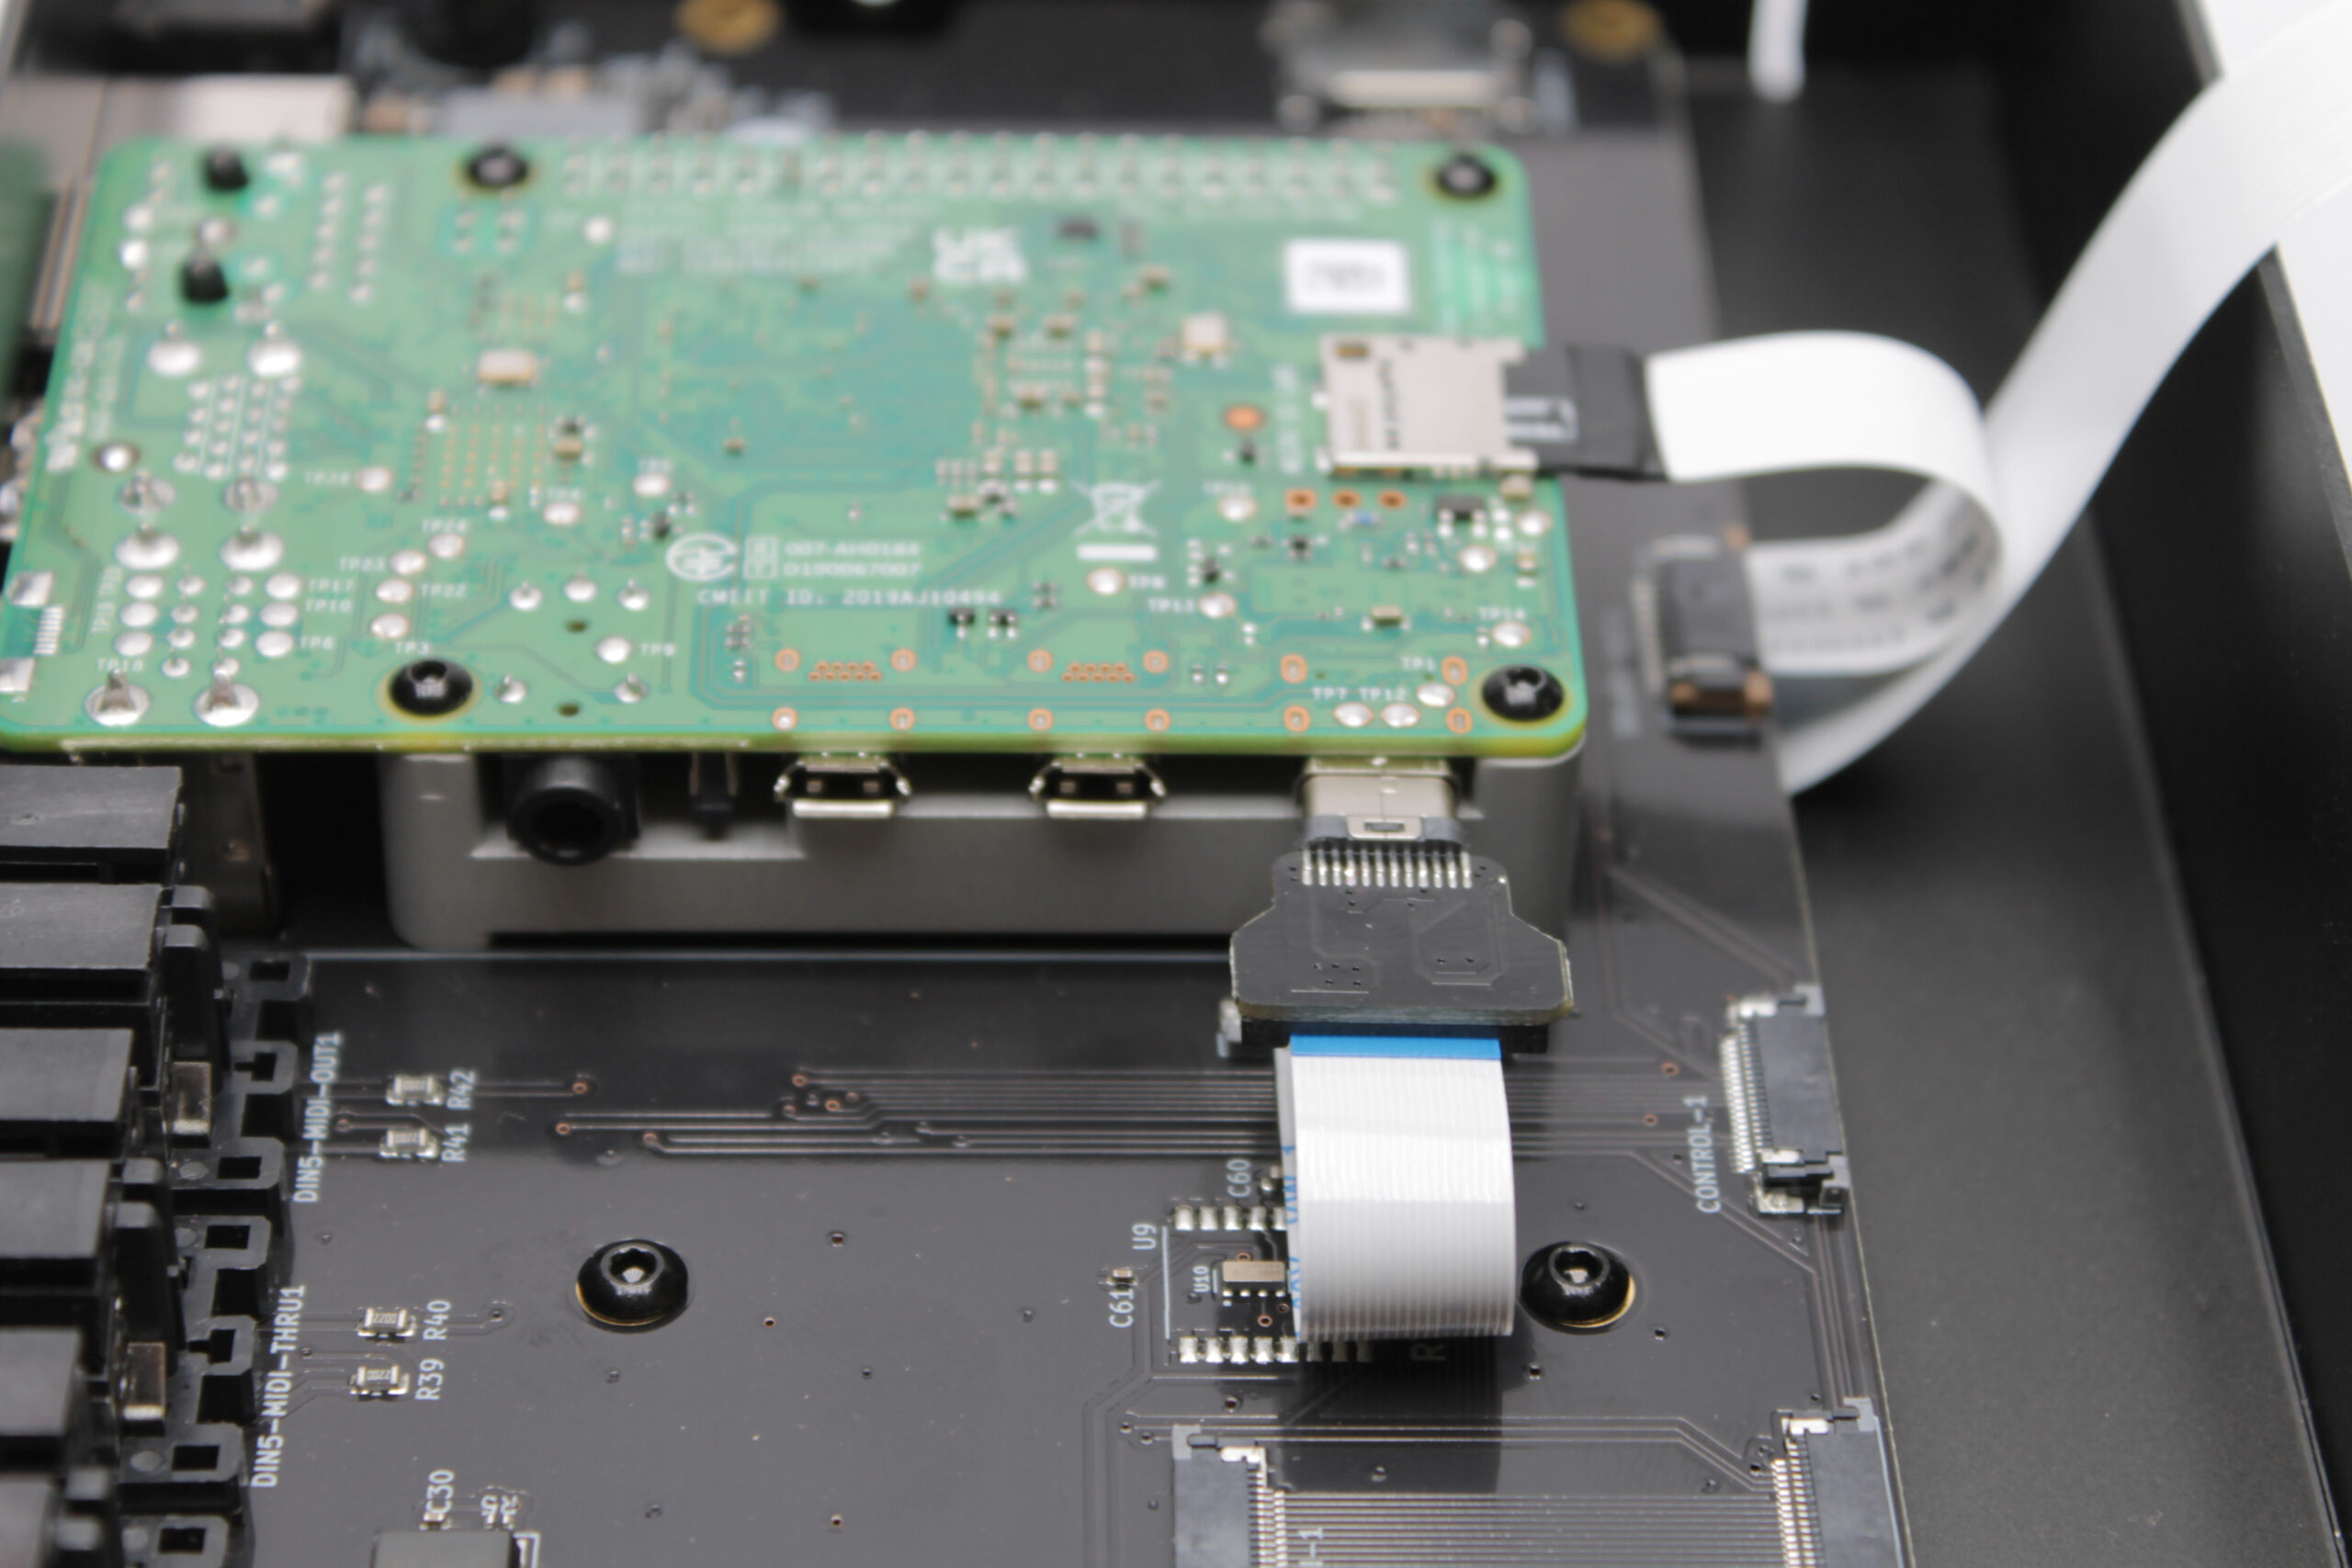
Now things becomes a little bit dramatic. The RPi4 is plugged on top of the main board and between them, firmly joining them, sites the thermal block, a mechanized aluminum block that bridges the RPi4 hot surfaces with the case’s bottom, passing thru the rectangle hole in the main board, and allowing to overclock the RPi4 up to 2 GHz without problem, even with high ambient temperatures over 30ºC. Without noisy fans prone to break. Without ventilation slots nor dust inside the case. Beautiful, right?
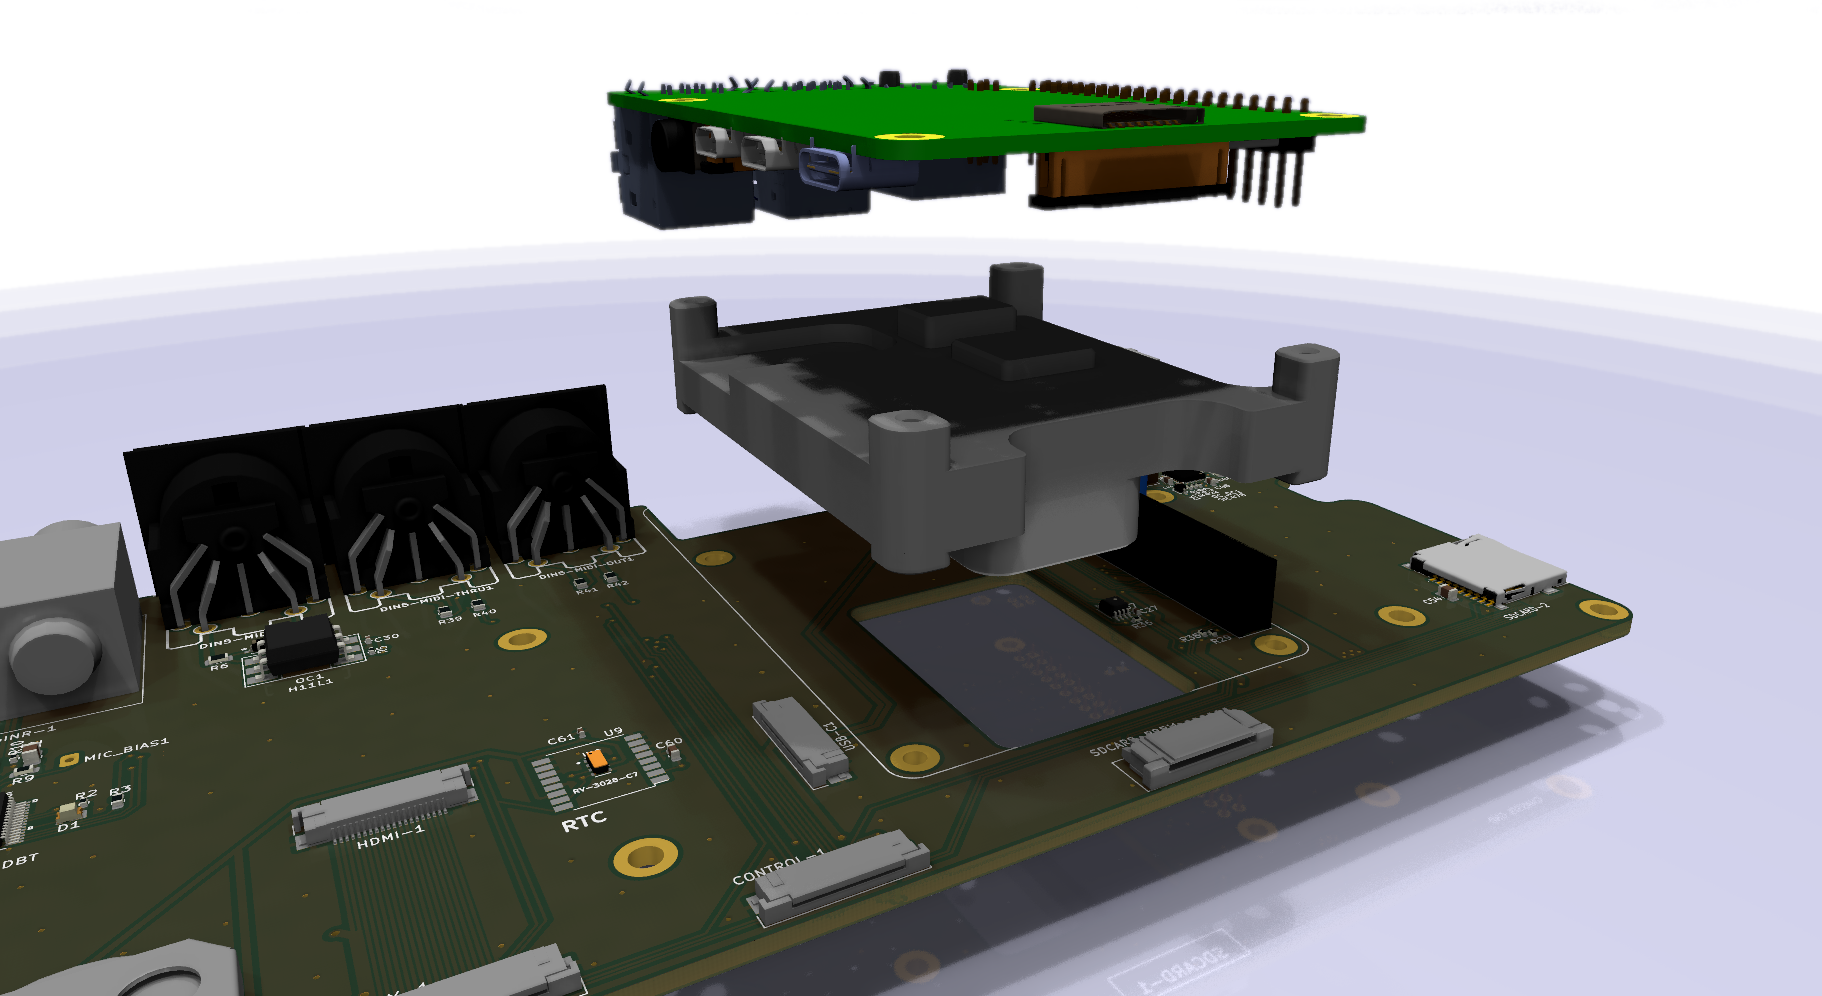
But there is still more. The RPi4 is not only connected to the main board by the 40 pin connector. Several flat cables bridges everything else:
- The USB-C port is bridged to the main board’s USB type-B connector, allowing to act as a USB class-compliant device.
- The RPi’s micro-SD card reader is bridged too, making accessible the micro-SD slot on the aluminum case side.
- Optionally, the RPi’s HDMI connector can be bridged too, what makes possible to easily integrate high resolution HDMI displays, but this would deserve a separated chapter. Not for today.
I must say that this clever design couldn’t be possible without the work of Octavio Vega, an extraordinary electronic wizard capable of almost everything (probably everything, if no resource constrains). He accepted to work with us for developing this piece of electronic art and i will be eternally grateful for it. Grazas meu irmán. Espero que non vos falten árbores!
The Control Board
The V5’s control board implements the new physical user interface, much richer, with 20 silicone push buttons and RGB LED feedback on each one. It keeps the 4 rotary encoders with switches, but arranged at right, in a single column.
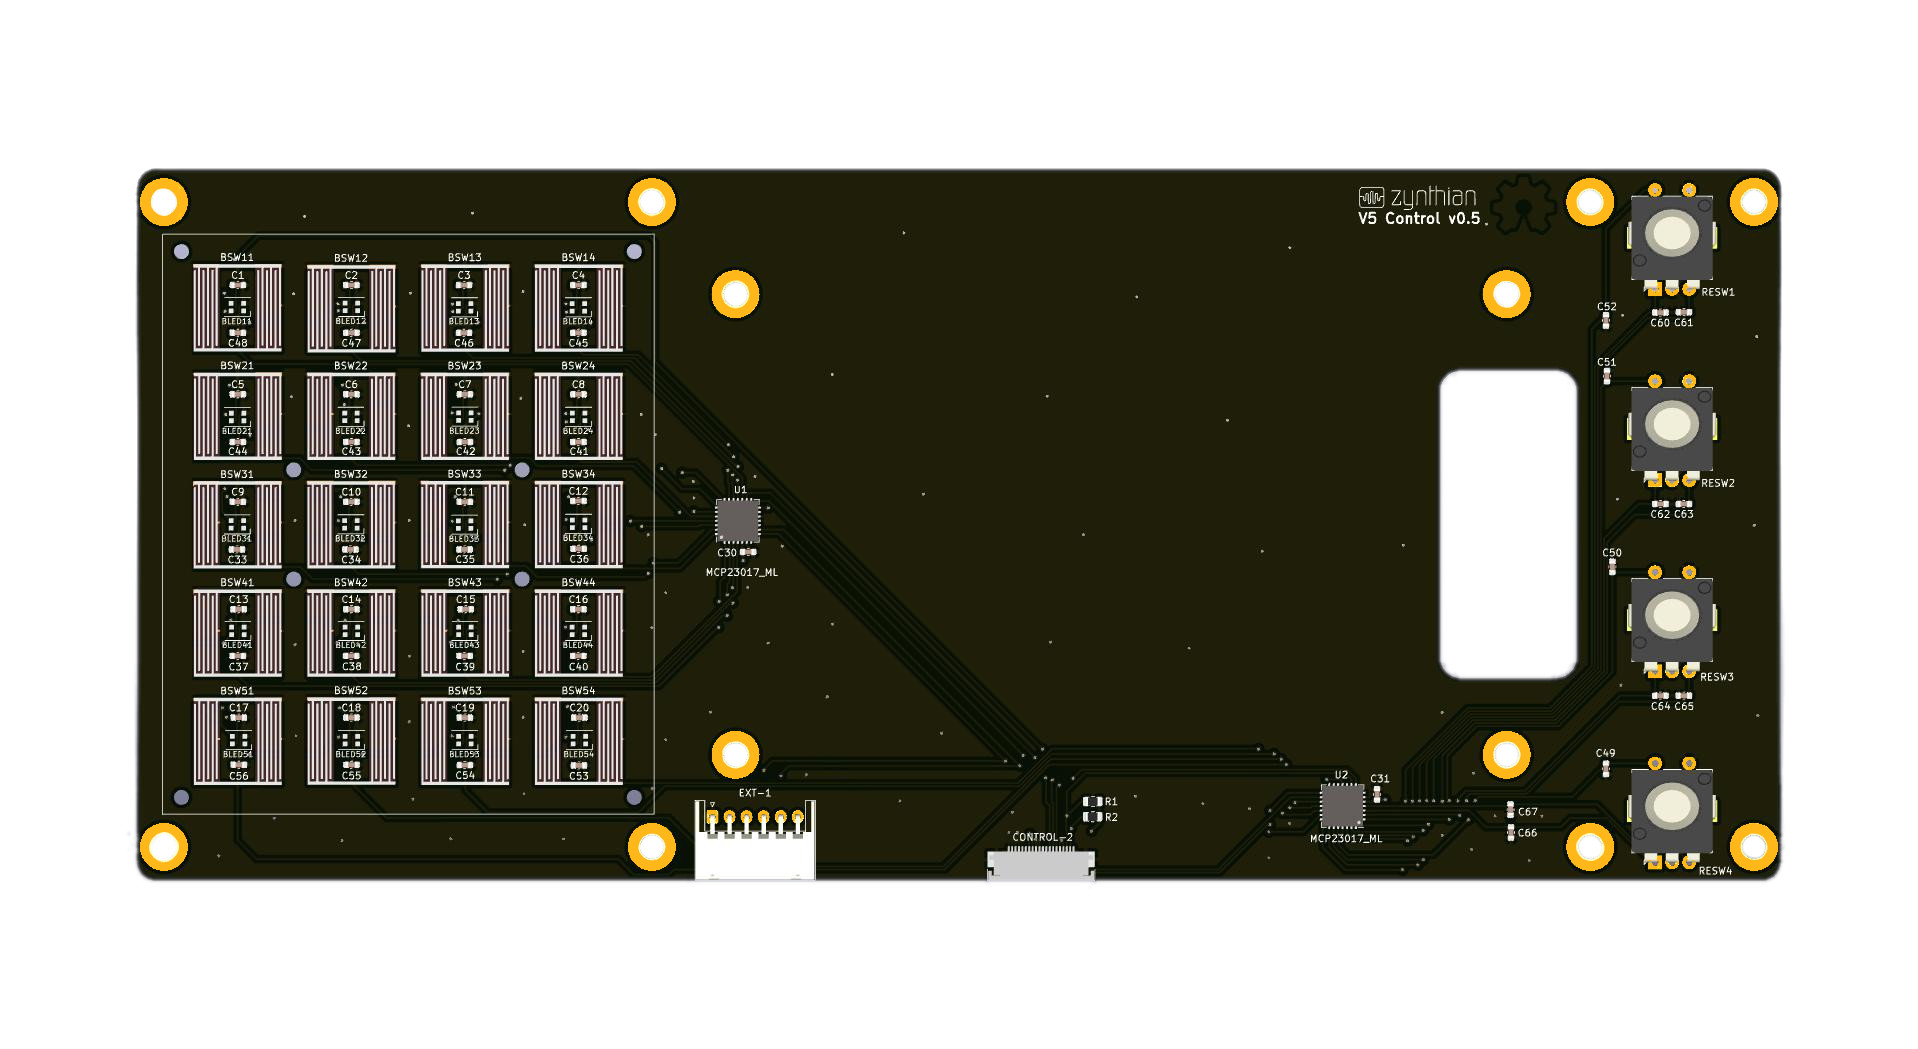
The control board also serves as a mounting base for the display, what allow us to get a fine fit with the case and have the display surface at the same level than the aluminum case.
The control electronics are quite simple, consisting of 2 MCP23017 chips, an old friend of zynthian. Finally, there is a 6-pin connector for extensions like CV/Gate, sensors, etc.
That’s all. Simplicity is beauty.
The display
The V5 integrates a 5 inch display with 5 points capacitive multi touch. The display is a DSI display that connects directly to the RPi’s DSI port, being natively supported by the graphics processor (GPU). The resolution is 800×480. Not much more to say.
The aluminum case
It could seem a simple task, but those with some experience on this kind of things know well that designing a good enclosure is everything but easy, and this is not a special case.
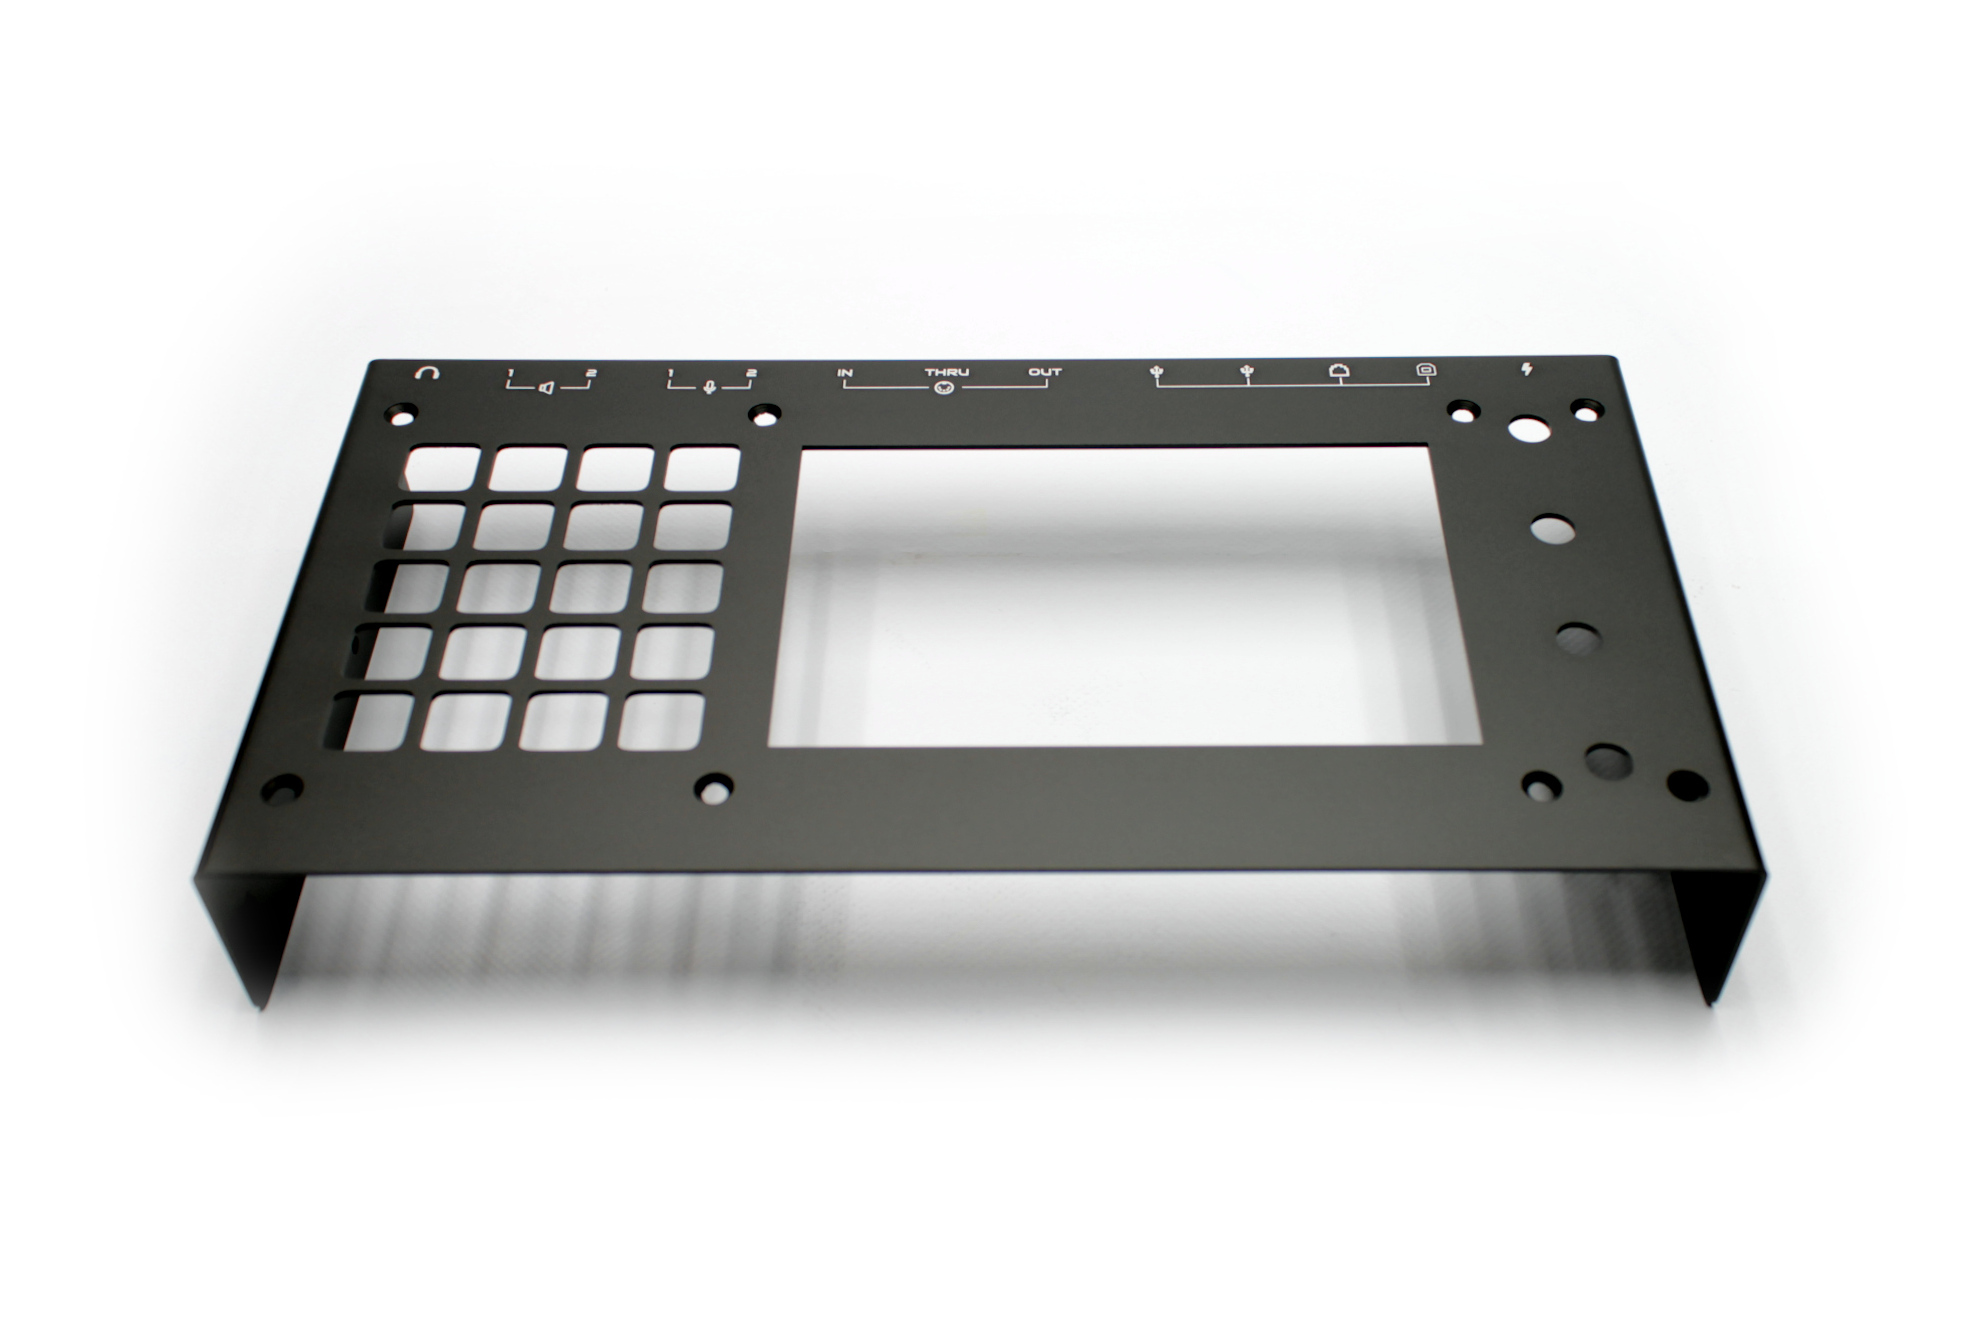
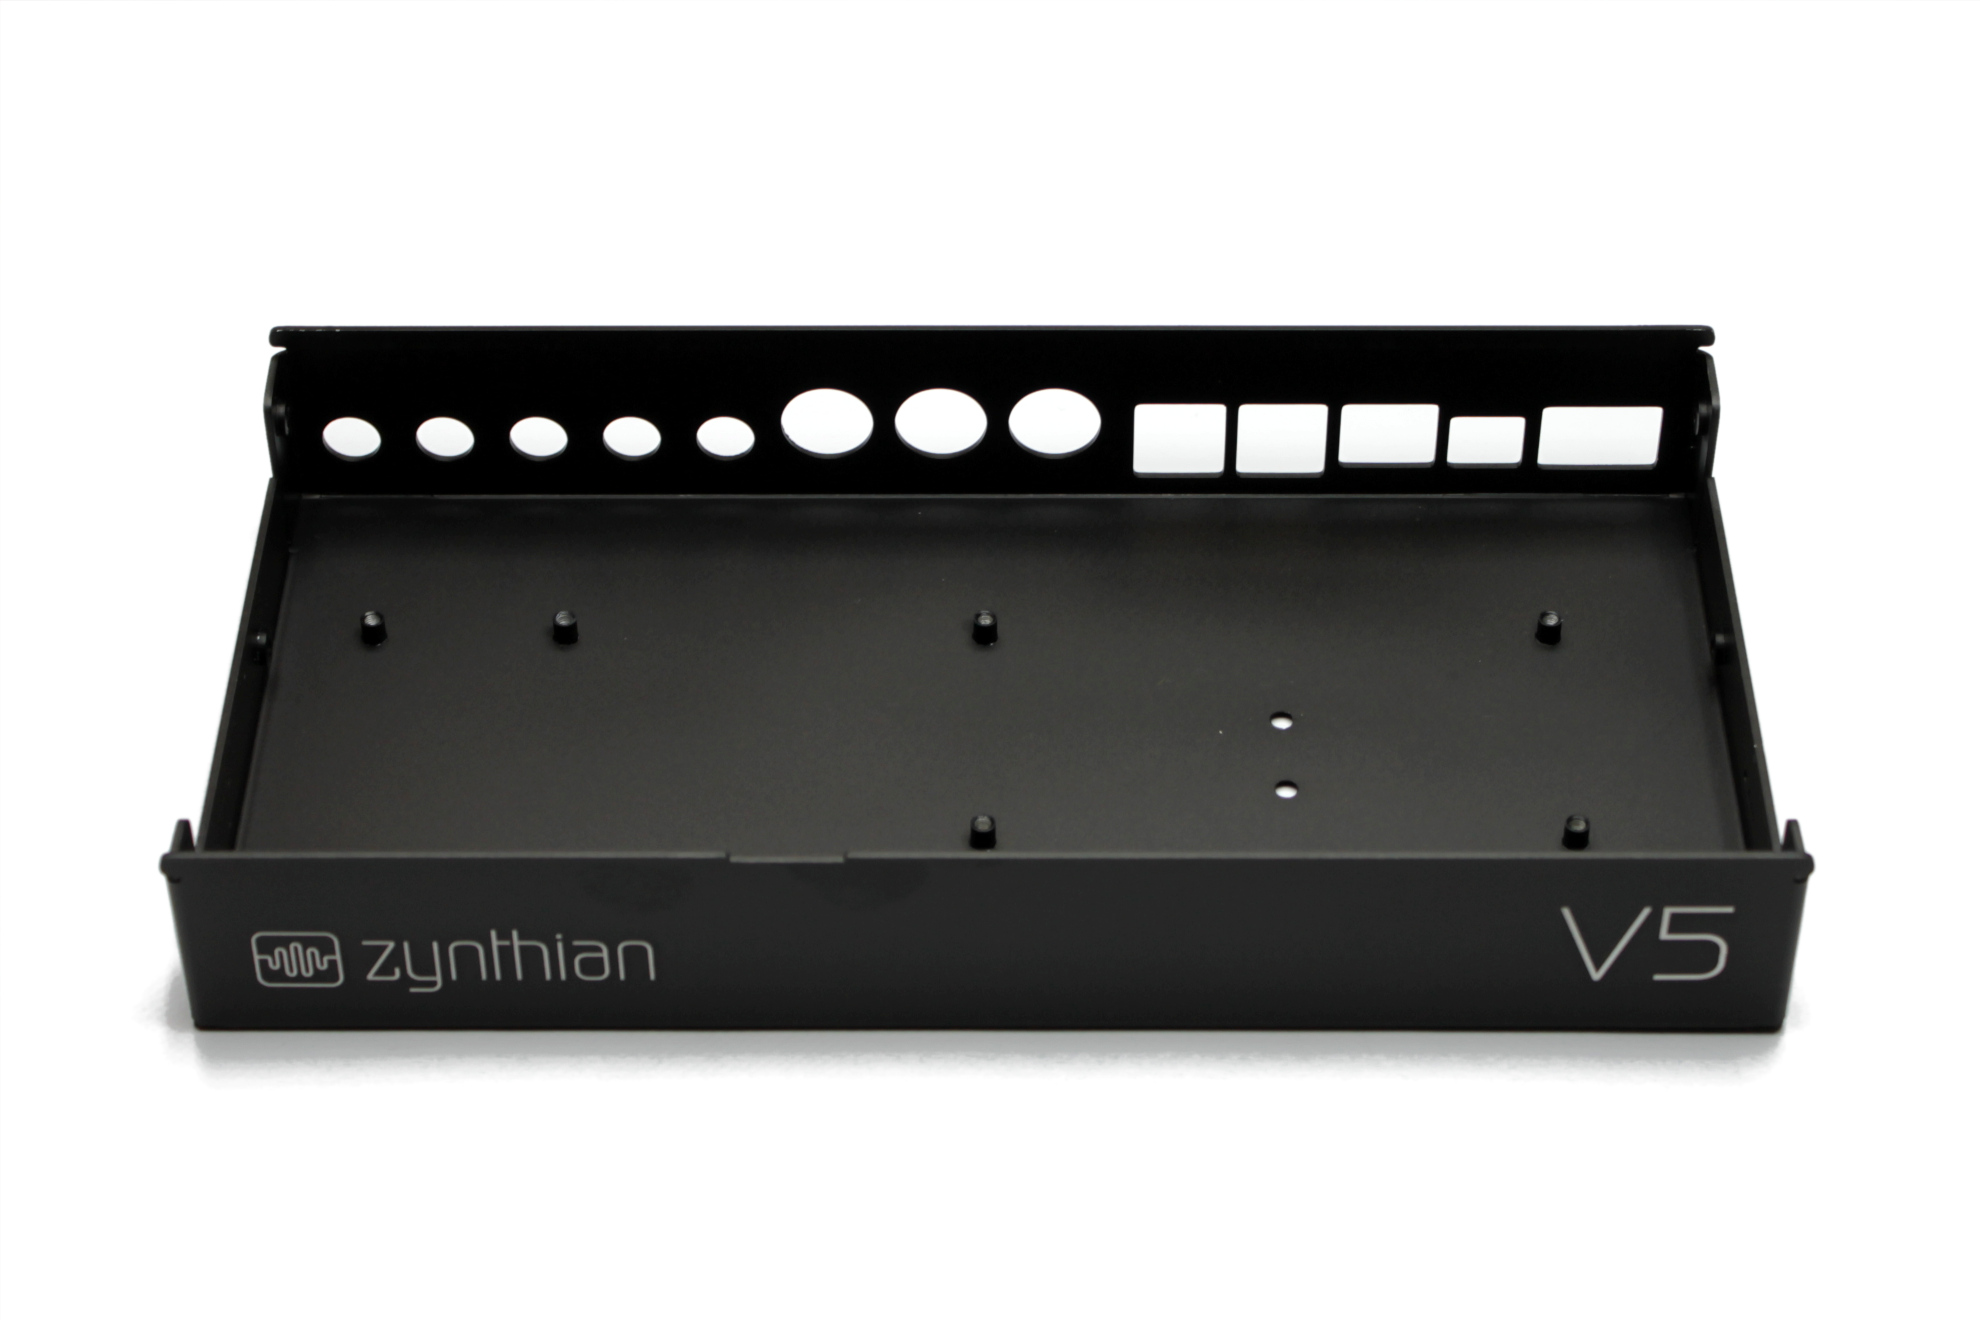
The V5 aluminum case accomplishes several functions in the overall design:
- it’s a solid protection for the delicate parts inside
- it’s a huge heat-sink that dissipates the heat generated by the RPi4, overclocked to the maximum
- it’s a good electromagnetic shield, isolating from electronic noise and others
- it’s a beautiful envelopment for a powerful device, and this is not a minor point because, by the way, we would like to sell some units
The V5 aluminum case, like the cases before it, wouldn’t be possible without the huge knowledge and experience of my dear friend Ramon Besora, the industrial designer and CAD wizard behind all zynthian mechanical & thermal aspects. Not to forget the excellent team behind him at BESMON S.L.
Apart from the aluminum case, Ramon and its team also designed and manufactured the thermal block, the nice mechanized knobs and much more.
The end result is an excellent device that greatly improves on previous designs. The effort has been worth, don’t you think?
And the best of all, the kit is so easy to assemble that everybody can do it with little effort. Of course, no soldering at all. Only cutting some pieces of thermal pad for fixating the thermal block, inserting some flat cables and driving some screws. If V4 kit could be assembled by your grandma, the V5 could be assembled by your cat. Take a look to the Building Guide.
V5 software
And of course, there is the software part. As you probably know, digital hardware does nothing without it.
There is a huge amount of work for getting things to work in the software side. To remark the more closely V5-related points:
- implementing LED feedback & all related workflow
- improving push button action to make it much more flexible and configurable
- improving display layout to make it more flexible
- implement power save mode to protect LEDs from burning out when leaving the unit powered on for long periods (many months)
- imagining and implementing a good workflow that profits from the new physical user interface, improves usability, it’s intuitive, fast and comfortable. Lots of iterations and not there yet! But it will very soon, thanks to user feedback.
Again, not just my work. Never! Thanks to all the contributors, specially to Mr. Brian Walton, who spent uncountable hours (and probably more!) improving the zynthian software and discussing with me and others how to do it. Thanks for all mate!
Can i see some video of the V5?
Of course! Take a look to some of them from our friend Floyd Steinberg:
You will find more in our youtube channel.
Where can i buy the Kit V5?
You simply visit the zynthian shop!
Enjoy!
[…] ZynthianLabs says that they are limiting purchases of the Zynthian Kit V5 to a small group, initially, so that they can validate both the Kit and the assembling instructions before opening sales to everyone. Details are available at the Zynthian site. […]
[…] ZynthianLabs says that they’re proscribing purchases of the Zynthian Package V5 to a small workforce, to start with, in order that they are able to validate each the Package and the assembling directions ahead of opening gross sales to everybody. Main points are to be had on the Zynthian website online. […]
[…] The Zynthian Kit V5 costs €490 exclude VAT without a Raspberry Pi and €570 exclude VAT with one (version 4, 4GB). Find out more on the Zynthian website. […]
How to order?
V5 is not available yet. When it’s available for sale, you could order from the shop.We hope to open in 2-3 weeks.
With the right tinkering this hardware would make a great basis for a software defined radio too.
Yes, indeed this hardware could be a great basis for a good bunch of applications, including radio, visuals, light control, etc. We can easily print customized keypads, if you feel brave enough to try to develop the software 😉
[…] https://blog.zynthian.org/2023/07/zynthian-kit-v5-is-here/ […]
i make sample based music ,, i got an roland404 mk2 ,, and an mpc ,, my question it’s about sampler ,, can you upload a video workflow ,, i open source software user in my comps by ethics ,, and really interested in your proyect ,, but the sampler sequencer efx workflow is important for me if can upload a vid,, and another question is if works whith rpi 4 8gb ,, i suppose tata yea
Currently Zynthian is not very well suited for sample based workflows. We are actively developing sampling features but the sampling engine is not ready for serious work yet. I don’t think Zynthian V5 is your machine right now, but it could be in 2024 😉
The best,
Really interesting project! How this device compare with something like SMPLTREK?
Are the recording capabilities comparable?
Zynthian’s main use-case is as a synthesizer / keyboard expander. In this arena, it’s really good. Zynthian sequencing and sampling capabilities are being currently developed and i wouldn’t recommend zynthian if your main use case is “sampling”. Anyway, i would outline the current capabilities and the projected ones. Current capabilities as “audio recorder/player”: + Good support for SFZ, SF2 and GIG soundfont formats (aka. sampled instruments). Editing of soundfonts must be done in a desktop/laptop computer. + Stereo recording + Live playing of 16 audio tracks. Each track has its own FX chain. There are hundreds of audio FX in… Read more »
Thank a lot for your exhaustive reply!
I’m mainly a guitar and bass player, singer.
I like the idea that I could record without a computer, having synth sounds and drum machines within reach when needed.That’s all, not really interested in sampling at the moment.
The best to you too!
I really like the Zynthian software itself, I really like the sounds I’ve been able to get with it just using my raspberry pi and my midi keyboard. The V5 kit that purpose built looks extremely cool but unfortunately I’ll never be able to afford it, I’m on a fixed income from an accident so the kit is far far far out of my price range but the software itself is super cool from what I’ve been able to experience of it
[…] Zynthian Kit V5 is here! 2023-07-04 […]
Were I can find it? It seems is out of stock
Hi Adrian!
You have to wait until it’s available again. Please, register in the shop for being notified.
Are you guys making more?
Yes, of course. We hope to have more units in the next 2-3 weeks
does raspberry pi 5 fit the latest version of the kit out of the box, or do we still have to attack the main board and case with a Dremel?
The latest V5 kit is designed for RBpi5. The aluminum case and other parts fits perfectly the RBPi5 board.